
I love it when a project turns out even better than I planned!

I’m sure many of you have one of these cheap plastic cauldrons tucked away in your Halloween decorations. Maybe you use it for handing out candy, as a witch’s prop, to serve drinks at a party, or keep your abandoned hopes and dreams in. I don’t know your life.
Whatever you use it for we can definitely make it look better while fulfilling it’s intended purpose. So let’s take it from Cheap to Creep and make that black plastic cauldron look old and used.
Need some tunes to craft to? Check out my “Feeling Witchy” playlist here.

First thing is first. There is no point in spending a lot of money on supplies to make this thing look cool – otherwise you would have just bought the old-looking one at Party City in the first place, amiright? So I took my enormous blog income ($3.17 on ads alone in JUST 3 1/2 months) to our local Dollar General.
Most dollar stores are created equal so you should be able to find this stuff at any Dollar General, Family Dollar, or whatever store around you claims that “everything is a dollar except the stuff that’s not.” You can also get these same supplies pretty cheap at craft stores or even Walmart.
Supplies

- Black Plastic Cauldron – if you have one, great! If not, get one here.
- Hot Glue Gun
- Hot Glue
- School Glue
- Tissue Paper (can also use paper towels or toilet paper)
- Paint Brushes – 1 Large, 1 Small, 1 Sponge (can also use paper towels instead of the sponge brush)
- Acrylic Paint – Red, Brown, Black & Silver or Gold (I just grabbed a multi color set that I can use on other projects and then mixed my own brown – you can do that too by combining complementary colors – blue/orange, red/green, purple/yellow.)
- Paint Pallet (optional, you can mix your paints on whatever – wax paper works well)
Instructions
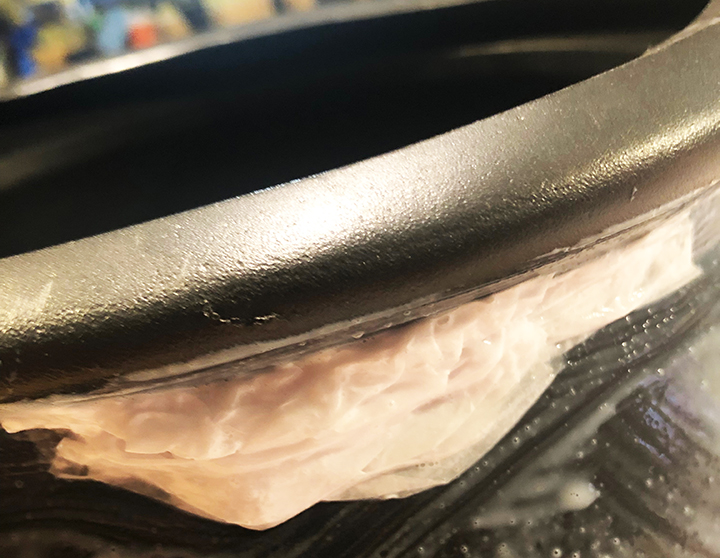
Rust Up
Rip pieces of tissue paper and attach them to the bottom of the cauldron rim with school glue. Use large paintbrush to cover the tissue paper with school glue. Place a few of these around the bottom rim, these are going to be rust spots. Let it dry and harden.
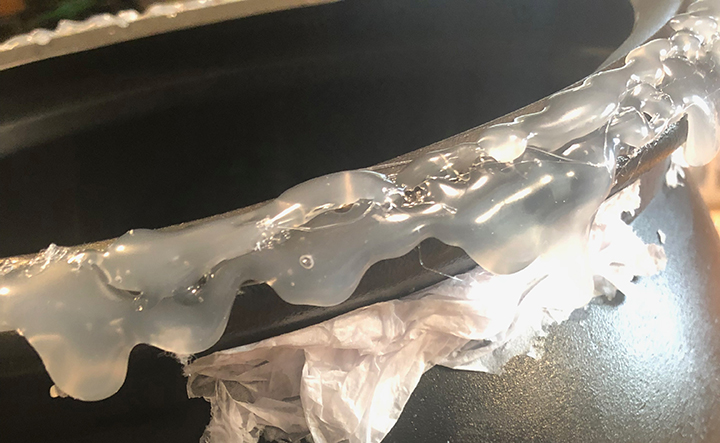
A Bubbling Brew
Use hot glue gun and glue to make drips around the rim of the cauldron. The best way I found to do this is to just put a big glob on the edge and let it drip over. May take a couple tries to get it to look the way you want it but that’s ok because once the hot glue dries it is really easy to just peel it off and try again. Let it dry and harden.

Totally Metal
Use the large brush and brown paint to paint the sides of the cauldron. Make cross-hatch like strokes to look like brushed metal.
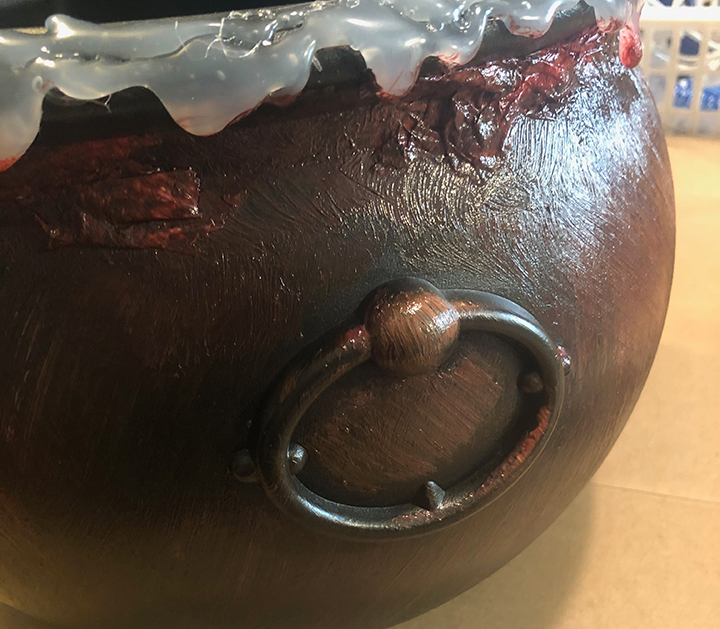
Mix different shades of brown to create texture.
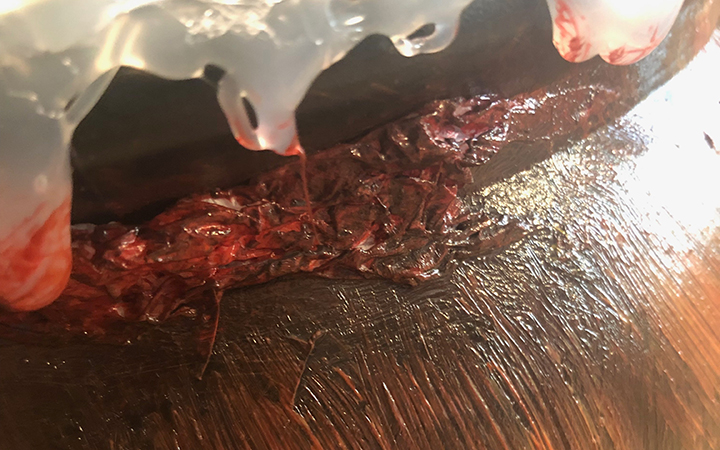
Dab the dried tissue paper with red and brown to make it look like rust.
Potent Potion
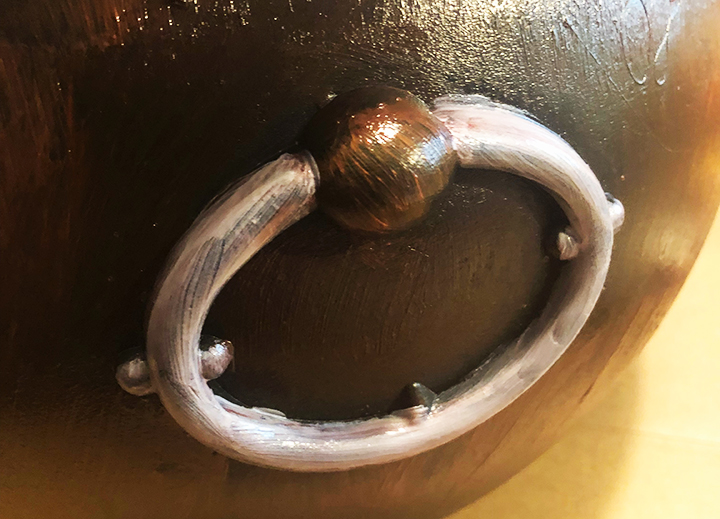
Take the small brush to paint the handles with the gold or silver paint.

With the sponge brush, dab your green paint all over the hot glue drips and the edge of the cauldron. Make sure to dab, not brush so it takes on the texture of a bubbling brew.
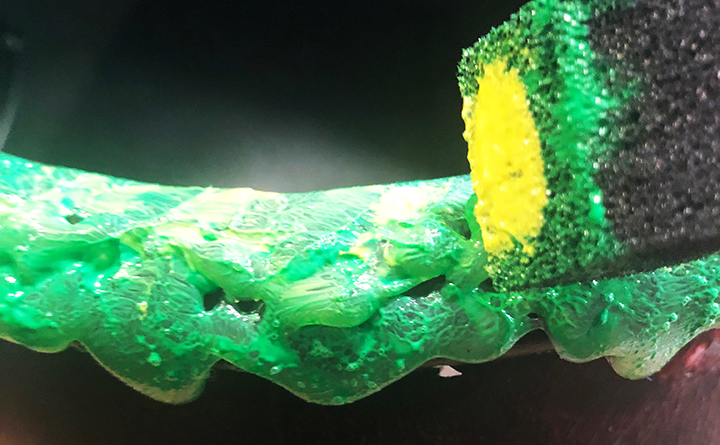
Add yellow paint sparingly over the green paint to create dimension.

You should have something that looks like this! If you need more texture, dab some more with the sponge before it dries.
Let the whole thing dry and then check back here next week for a tutorial on how to make your new creepy cauldron look like it’s sitting on top of an open fire!
Need a reminder? Do you want to keep up with all our upcoming projects? Join our mailing list!
This is a great project. Love the way you think on keeping it low budget! I will be making several of these with different colored “brew” for Halloween. Thank you for sharing!
This is so awesome! Never seen anything like this! I love it!
How well does this hold up to rain? I leave mine outside through the whole month and we tend to have some good storms.
I use mine inside, so I can’t tell you for sure. If you are using it outside you may want to consider a clear coat of some kind to make it last longer. The paint is on their pretty good though so I don’t think it will be much of an issue.
Great idea thanks. I might add some purple glitter too the hot glue area too! 🕸🕷🧟♀️
Oh I bet that will look really cool!
I used glow in the dark paint on the green part..pillow stuffing inside the pot..and some color changing pumpkin lights in the pillow fluff..I had put styrofoamnear the top of the pot..the blinking lights on top of that..and then the pillow stuffing..then I just poked tootsie pops into the foam and the kids could pick them out..a good hands free way of handing out candy
Great idea! I’d love to see pictures 🙂
Will post pictures when I put Halloween up in a week or so
I’m working on mine now, just got the paper on for the rust spots, after I get the hot glue bubbling over, i’m going to use the green spider webbing instead of the paint, not sure how my idea is going to work but who knows anything is possible,, lol, thanks for sharing this
Cool idea! I’d love to see a picture of how it turns out 🙂
How do I send you a picture of mine? I combined techniques from your site and one other to get the look I wanted.
Send to michelle@frightathome.com – I can’t wait to see it!
i sent a pic of my finished one, if you don’t get it please let me know,, thanks , this was fun projuect
I followed the instructions and it looks awesome.
Only problem is that when I use the diffuser to create a smoke effect, a lot of waterdrops fall on the painted border and the paint is coming off. I already applied a varnish over the paint but still.
How did you solve this on your cauldron ?
Huh, I actually didn’t have that problem so I don’t know what to tell you. A waterproof clear coat might help and maybe try positioning the diffuser lower in the cauldron so it doesn’t splash over the sides as much?